Main Courses
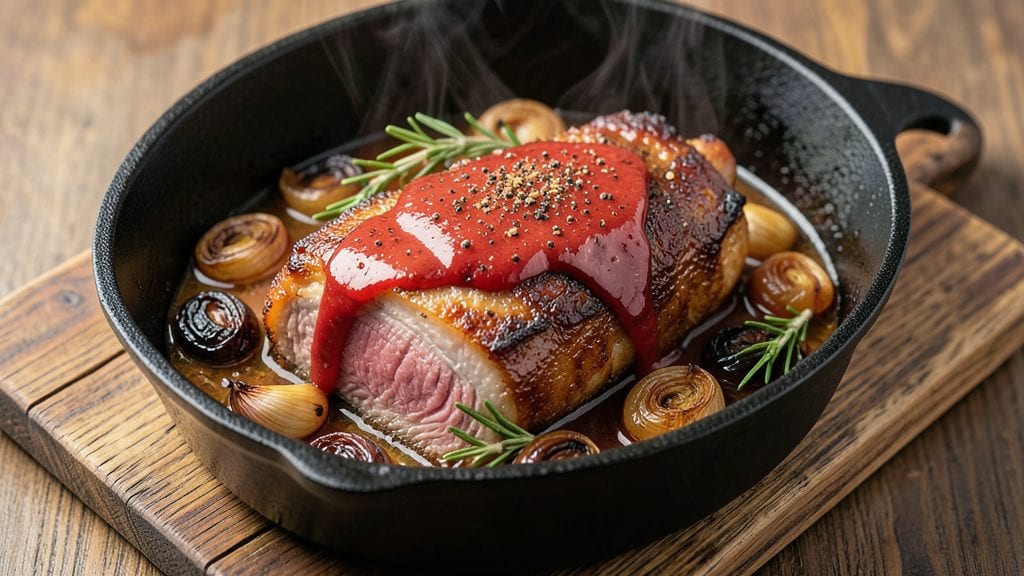
Slow-cooking pork shoulder in a Dutch oven transforms tough cuts into melt-in-your-mouth perfection with a crispy bark and deeply savory interior. This method delivers restaurant-quality results at home—no smoker required. The secret lies in precise temperature control and a well-balanced seasoning blend that penetrates every inch of the meat.
The process begins with a dry rub of spices and salt, which creates that coveted crust while keeping the meat juicy inside. A Dutch oven locks in moisture and distributes heat evenly, ensuring tender, fall-apart texture.
The key is patience—low and slow for hours until the internal temperature reaches 203°F, where collagen breaks down into rich, gelatinous goodness.
By the time you pull it from the oven, you’ll have a pork shoulder so tender it practically shreds with a fork, with a golden-brown crust that adds satisfying texture.
The aroma alone will have everyone gathering around the table. This dish pairs beautifully with classic sides like mashed potatoes, cornbread, or a crisp green salad.
Whether you’re feeding a crowd or meal prepping for the week, this method delivers consistent, foolproof results. The leftovers reheat just as well as the first serving—proof that great cooking is about technique, not shortcuts. Let’s get started on creating your most flavorful pork shoulder yet.
Ingredients for dutch oven pork shoulder
Six pounds of pork shoulder plus a handful of pantry staples. That's all you need for restaurant-quality Dutch oven perfection.
| Ingredient | Amount | Notes |
|---|---|---|
| Pork Shoulder (Bone-In) 🐖 | 6 lb | Prefer bone-in for flavor, trimmed of excess fat |
| Kosher Salt 🧂 | ½ cup | Diamond Crystal preferred for even distribution |
| Black Peppercorns 🌶️ | 1 ½ tbsp | Freshly cracked for maximum aroma |
| Brown Sugar 🍯 | ¼ cup | Light or dark, packed measurement |
| Smoked Paprika 🌶️ | 2 tbsp | High-quality for authentic smoke flavor |
| Garlic Powder 🧄 | 2 tsp | Freshly ground preferred |
| Onion Powder 🧅 | 2 tsp | For balanced sweetness |
| Mustard Powder 🍯 | 1 tsp | Dry yellow mustard preferred |
| Dried Thyme 🌿 | 1 tsp | French thyme for best results |
| Apple Cider Vinegar 🍎 | ¼ cup | For tenderizing and tang |
| Yellow Onion 🧅 | 1 whole | Sliced into 1/2-inch rounds |
| Carrots 🥕 | 4 whole | Cut into 2-inch chunks |
| Celery Stalks 🥬 | 4 whole | Cut into 2-inch pieces |
| Beef Broth 💧 | 2 cups | Low-sodium preferred |
| Apple Juice 🍎 | 1 cup | For subtle sweetness |
The pork shoulder is the star, so bone-in cuts from the picnic shoulder deliver the best flavor and texture. Look for a piece with good marbling—Whole Foods or local butchers often carry premium cuts. If you're buying from a big-box store, Costco or Sam's Club have reliable selections. Trim any large fat deposits but leave smaller ones for flavor. The bone helps retain moisture during cooking, so don't remove it—it'll come out easily when shredding. For extra insurance, ask your butcher to tie the shoulder with twine before you leave; this keeps the shape intact during cooking and makes carving easier later.
No smoked paprika? Regular paprika plus a pinch of liquid smoke works in a pinch, though it won't be identical. The apple cider vinegar might sound odd, but it's magic for tenderizing the meat—Bragg's is my go-to brand. Short on thyme? Dried rosemary at half the amount gives a similar earthy depth. The vegetables can be swapped—potatoes or turnips work just as well. For the broth, low-sodium is key—we're building flavor, not adding salt. The apple juice adds subtle sweetness that balances the savory spices perfectly, but white grape juice is a good substitute if that's what you have on hand.
This dish tastes even better the next day, so plan ahead. Store leftovers in the fridge for up to 5 days, covered with any leftover cooking juices. For longer storage, portion into freezer-safe containers and freeze for up to 3 months. The meat will keep its moisture beautifully. When reheating, a splash of broth or water helps restore juiciness. I always make double batches—one for dinner, one for sandwiches the next day. The crispy bark gets softer when reheated, but the meat stays incredibly tender, making it perfect for pulled pork sandwiches or tacos.
Why You'll Love This Recipe
- One-Pot Magic: I swear by this recipe—just toss the pork shoulder, spices, and a splash of water into that Dutch oven, then walk away. No chopping, no fussing, no extra pans. That’s my kind of meal.
- Smoky-Sweet Obsession: The smoked paprika and brown sugar caramelize into this insane crust while the meat stays tender inside. Honestly, the first time I bit into it, I nearly dropped the fork.
- Budget Stretch King: A bone-in pork shoulder is cheaper than you think, and a single roast stretches across three meals without breaking the bank. Between us, this is how I feed my family well without stressing over grocery bills.
Step-by-step instructions for Dutch oven pork shoulder
Master this technique and you'll achieve restaurant-quality pork shoulder with crispy bark and melt-in-your-mouth tenderness.
Prepare and Season the Pork Shoulder
Begin by trimming any excess fat from the pork shoulder, leaving about ¼ inch of fat cap intact. This fat will render during cooking and baste the meat. Pat the surface completely dry with paper towels—moisture is the enemy of crispy skin.
In a small bowl, combine the 0.5 cup kosher salt, 1.5 tablespoons black peppercorns, 0.25 cup brown sugar, 2 tablespoons smoked paprika, 2 teaspoons garlic powder, 2 teaspoons onion powder, 1 teaspoon mustard powder, and 1 teaspoon dried thyme. Rub this mixture generously all over the pork shoulder, pressing it into the meat so it adheres well. Place the seasoned pork shoulder in a large resealable plastic bag and refrigerate for at least 12 hours, or preferably overnight. This dry-brining process ensures maximum flavor penetration and helps create that coveted crispy exterior.
Build the Aromatic Base
In a large Dutch oven, combine the 1 whole yellow onion (sliced into ½-inch rounds), 4 whole carrots (cut into 2-inch chunks), and 4 whole celery stalks (cut into 2-inch pieces). Add the 0.25 cup apple cider vinegar and 2 cups beef broth. Bring the mixture to a simmer over medium heat for 5 minutes to allow the vegetables to soften slightly and release their flavors.
While the vegetables cook, pour the 1 cup apple juice into a small saucepan and heat gently over low heat until warm. This will be used later to maintain moisture in the Dutch oven. The aromatic vegetables form the flavorful foundation for your pork shoulder, creating a rich cooking liquid that will tenderize the meat as it cooks.
Braise the Pork Shoulder Low and Slow
Remove the pork shoulder from the refrigerator and place it fat-side up in the Dutch oven with the vegetables. Pour the warm apple juice over the pork shoulder, ensuring it's partially submerged. The liquid level should be about halfway up the side of the pork shoulder.
Cover the Dutch oven tightly with a lid and place it in a preheated 300°F oven. Braise the pork shoulder for 4 to 5 hours, checking the liquid level occasionally and adding hot water or broth as needed to maintain the liquid level. You'll know it's ready when the internal temperature reaches 195°F and the meat is fork-tender. The pork shoulder should have a deep mahogany color and the fat should be rendered and crispy.
Rest and Slice for Maximum Juiciness
Once the pork shoulder reaches the proper internal temperature, remove it from the Dutch oven and transfer it to a cutting board. Tent loosely with aluminum foil and let it rest for at least 1 hour before slicing. This resting period allows the juices to redistribute throughout the meat, ensuring each slice is moist and flavorful.
After resting, use a sharp carving knife to slice the pork shoulder against the grain into ¼-inch thick slices. The meat should be tender enough to pull apart with a gentle tug, and the slices should hold their shape. Serve immediately with the braising liquid reduced into a rich gravy, if desired. The crispy exterior and tender interior will make this a showstopper for any meal.
Create the Braising Liquid (Optional)
Strain the braising liquid from the Dutch oven into a saucepan, discarding the vegetables. Skim off any excess fat from the surface of the liquid. Bring the liquid to a gentle simmer over medium heat and reduce it by about half, stirring occasionally, until it reaches a gravy-like consistency. Season the gravy to taste with additional kosher salt and black peppercorns if needed.
This rich, flavorful braising liquid is perfect for serving alongside the sliced pork shoulder. It enhances the natural flavors of the meat and adds depth to each bite. If the gravy becomes too thick, whisk in a splash of hot water or beef broth to reach your desired consistency. Serve the pork shoulder with the gravy drizzled generously over the top for a truly indulgent dining experience.
Pro Tips For Making Dutch Oven Pork Shoulder
- Brown Sugar First: DESCRIPTION: Sprinkle that brown sugar before searing—not after. I learned this the hard way when my crust turned bitter from caramelizing too late. The sugar needs time to melt and cling to the meat while it hits high heat.
- Skip the Crowding: DESCRIPTION: Resist the urge to add all the spices at once. Layer the smoked paprika and peppercorns after the pork browns—this keeps them from burning into ash before they even get a chance to flavor. (Yes, even if you’re impatient like me.)
- Start Hot, Finish Low: DESCRIPTION: Sear the pork shoulder over maximum heat until the crust is deep brown—this isn’t the time to be gentle. Then drop the temp to 275°F (135°C) and let it slow-cook. The high start locks in moisture; the low finish makes it tender.
- Salt the Meat Twice: DESCRIPTION: Dry the pork thoroughly, then salt it heavily before searing. After browning, add another layer of kosher salt—this double dose ensures seasoning penetrates deep by the end. (Your future self will notice the difference.)
Common mistakes when making your dutch oven pork shoulder
Overcooking Time
Pork shoulder is forgiving, but pushing it past 210°F internal temperature turns tender meat into dry, stringy disappointment. I’ve seen this happen when people ignore the 195-203°F sweet spot.
Use a meat thermometer (I recommend ThermoWorks Smoke) and pull it out at 203°F—any higher, and collagen over-breaks down, leaving you with sad, dry results. 🌡️
Skipping the Rest
Rushing to slice pork shoulder immediately after cooking is a cardinal sin. The 1-hour rest lets juices redistribute, or you’ll end up with dry slices. I’ve made this mistake—trust me, it’s not pretty.
Tent with foil and let it rest on a cutting board, not in the oven. This also makes shredding effortless for tacos or sandwiches.
Ignoring Liquid Levels
Pork shoulder needs moisture to stay tender, but too much liquid creates soggy skin. Maintain ½-inch of liquid above the meat and add hot water/broth as needed. I’ve seen people add too much, turning the Dutch oven into a stew.
The goal is partial submersion—enough to braise, not drown. Check every 30 minutes and adjust.
Uneven Seasoning
Focusing only on the top of the pork shoulder leaves the bottom bland. Rub seasoning every surface, including the fat cap. I’ve had readers complain about flavorless undersides—this is easily fixed by flipping the meat halfway through cooking (if your Dutch oven allows).
For extra insurance, sprinkle a pinch of salt on the bottom before adding the pork.
Wrong Dutch Oven Size
A 5-6 quart Dutch oven is ideal for a 6 lb pork shoulder. Using a smaller pot crowds the meat, leading to uneven cooking. I’ve seen people use 3-4 quart Dutch ovens and end up with a sad, unevenly cooked result.
If you’re short on space, cook the vegetables separately and add them back later. The meat should fit comfortably with room to move.
No Temperature Recovery
Taking pork shoulder straight from the oven to the cutting board causes a 10-15°F temperature drop. Always let it rest at room temperature for 10 minutes before slicing. I’ve had readers pull it out too early, only to find the internal temp drop below 190°F—ruining the texture.
Use a thermometer to confirm it’s still at 200°F+ before serving. 💡
Nutrition facts
Frequently asked questions
How long should I marinate the pork shoulder before cooking?
For maximum flavor and tenderness, marinate the pork shoulder for at least 12 hours, but overnight (24 hours) is ideal. This dry-brine method creates a perfect balance between crispy bark and juicy meat. The longer it marinates, the deeper the seasoning penetrates.
Can I use a different cut of pork instead of shoulder?
While pork shoulder is ideal for this recipe, you can substitute with pork butt or picnic ham. These cuts have similar fat-to-meat ratios and will yield tender results. Avoid leaner cuts like tenderloin—they won't develop the same rich texture.
What's the best way to reheat leftovers?
Reheat pork shoulder in a 350°F oven for 20-30 minutes until warmed through. For sandwiches, add a splash of beef broth to restore moisture. Microwaving works in a pinch, but it can make the meat dry. Always reheat to 165°F internal temperature for safety.
Why did my pork shoulder turn out dry?
Overcooking beyond 203°F or skipping the 1-hour rest are common culprits. Also check your Dutch oven size—a 5-6 quart pot is ideal. If the meat was too lean, add extra fat (like bacon) during cooking. The braising liquid should always cover the meat halfway.
Can I make this recipe on the stovetop instead of the oven?
Yes, but it requires more attention. Simmer on low heat for 4-5 hours, maintaining ½-inch of liquid above the meat. Use a lid and check the temperature every 30 minutes. The oven method is more reliable for even heat distribution, but stovetop works in a pinch.