Soups & Stews
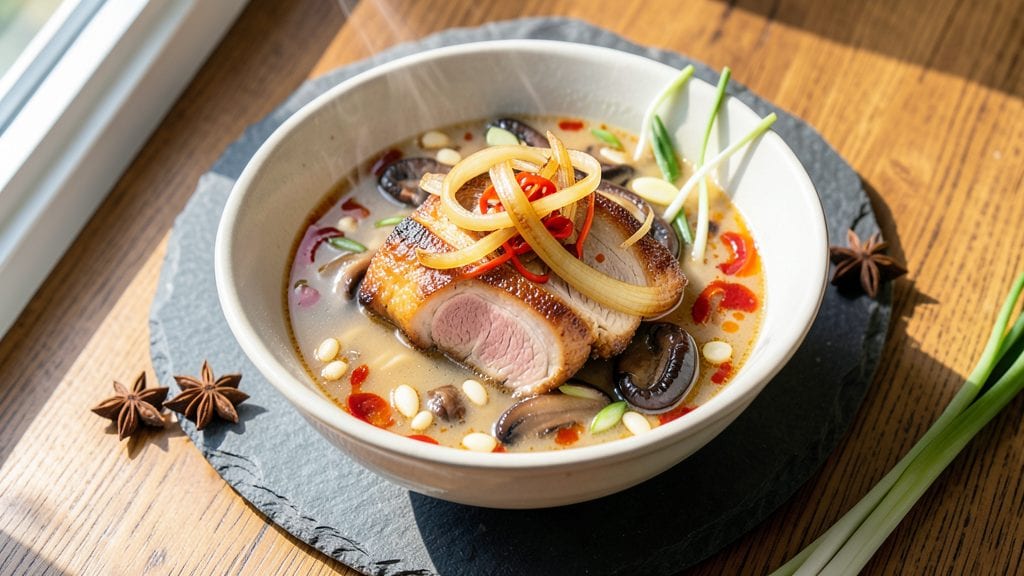
Mastering pork belly ramen broth transforms a simple soup into a restaurant-worthy experience that rivals any Japanese izakaya. 🔥 As someone who grew up in Georgia where pork was the heart of every family meal, I’ve spent years perfecting this technique—slow-cooking pork belly until the fat renders into liquid gold, creating a broth so rich it needs no embellishment. The key lies in patience: letting the collagen break down over hours to deliver that deep, umami-packed essence that defines great ramen.
This isn’t your average broth—it’s a labor of love that starts with high-quality pork belly, simmered low and slow with aromatics until the fat separates into a velvety, golden layer on top.
I use a combination of soy sauce, miso, and a touch of sesame oil to build complexity, while star anise and dried shiitake mushrooms add layers of earthy depth. The result? A broth so flavorful it makes even the simplest toppings—like soft-boiled eggs and chashu pork—shine.
By the time you’re done, you’ll have a pot of liquid gold that’s rich enough to stand alone but versatile enough to elevate any ramen bowl. The fat should be rendered but still glossy, the aroma intoxicating, and every sip packed with that unmistakable umami punch.
This is the kind of broth that turns a weeknight dinner into a memorable feast—no shortcuts, just pure, slow-cooked satisfaction.
Serve it traditional-style with ramen noodles, soft-boiled eggs, and your choice of toppings, or use it as a base for other dishes where deep flavor is key. The leftovers? Even better the next day as the flavors meld further. Let’s get cooking.
Ingredients for pork belly ramen broth
Pork belly and aromatics transform water into liquid umami gold—just 13 ingredients for restaurant-quality broth.
| Ingredient | Amount | Notes |
|---|---|---|
| Pork Belly 🥓 | 4 lb | Skin-on, cut into 1-inch cubes |
| Yellow Onion 🧅 | 2 whole | Quartered, skin on for color |
| Garlic Cloves 🧄 | 8 cloves | Smashed, skin on for aroma |
| Fresh Ginger 🌿 | ½ cup | Julienned, about 2-inch piece |
| Dried Shiitake Mushrooms 🍄 | 4 whole | Stems removed, torn quarters |
| Star Anise 🌟 | 2 whole | Lightly crushed for aroma |
| Sesame Oil 🫒 | 1 tbsp | Toasted, for finishing |
| Light Soy Sauce 🍶 | ½ cup | Kikkoman preferred |
| White Miso Paste 🧈 | 2 tbsp | High-quality, smooth texture |
| Water 💧 | 8 cups | Filtered preferred |
| Salt 🧂 | 1 ½ tsp | Kosher or sea salt |
| Black Peppercorns 🌶️ | 10 whole | Crushed lightly |
| Green Onion 🧅 | 2 whole | For garnish, chopped |
The pork belly is non-negotiable—look for thick-cut, well-marbled pieces from the butcher section. Costco or Whole Foods usually carry high-quality cuts, but any grocery store's meat counter will work if you ask for the freshest cut. The skin-on variety renders more fat, which is what we want here. If you can't find it pre-cut, ask for 1-inch cubes—this ensures even cooking and maximum fat release. For the aromatics, fresh ginger and shiitake mushrooms are worth seeking out at an Asian market—they add that authentic depth you can't get from dried substitutes.
No star anise? Skip it entirely—this broth can still shine without it. Short on miso? Double the soy sauce instead. The sesame oil is for finishing, so if you're out, toasted sesame seeds sprinkled on top work too. For the mushrooms, dried porcini in place of shiitake gives a similar earthiness. The ginger can be substituted with galangal if you're feeling adventurous, but fresh ginger is ideal here—it's the backbone of that bright, zesty note that cuts through the richness. And if you're using pre-minced garlic from a jar, rinse it well first to remove the excess oil.
This broth gets better with time—3-4 days in the fridge lets the flavors meld perfectly. For longer storage, freeze in ice cube trays for easy portioning later. The fat layer on top is pure liquid gold—save it to cook with or drizzle over noodles. If you're making this ahead for a party, keep it covered but uncovered for the last 30 minutes of simmering to reduce slightly. And trust me on this—always make a double batch. The leftovers reheat beautifully and taste even better the next day.
Why You'll Love This Recipe
- Minimal Chopping Required: I swear by this—just slice the onion and ginger into thick chunks, toss in whole garlic cloves, and let the pot do the work. No dicing, no fuss, and still packed with flavor.
- Rich Umami Magic: That crispy pork belly crackling in the pot? Pure gold. The shiitake mushrooms soak up the fat and deepen the broth into something so savory, you’ll want to sip it straight from the spoon.
- Weeknight to Weekend: Make a double batch on Sunday—it’s my secret for stress-free dinners. Freeze half for lazy nights, and the rest transforms into ramen, dumplings, or even a quick stir-fry sauce.
- Budget-Friendly Luxury: Pork belly might sound fancy, but it stretches farther than you’d think. A single slab feeds a crowd, and the dried mushrooms add depth without breaking the bank. (Between us, this is how I trick people into thinking I cook gourmet.)
Step-by-step instructions for pork belly ramen broth
Here's how to transform simple ingredients into a velvety, umami-packed broth that'll make your ramen unforgettable.
🔥 Step 1: Render the Pork Belly Fat for Rich Flavor
Place the 4 lb pork belly (cut into 1-inch cubes) in a large Dutch oven over medium-low heat. Let it cook undisturbed for 20-25 minutes until the fat begins to render and the meat turns opaque. You'll see the fat pool at the bottom—this is the foundation of your broth's richness.
Here's the thing—don't rush this step. The fat needs time to slowly render without burning. If you see the fat starting to smoke or darken, reduce the heat slightly. You want that fat to be golden and shimmering, not browned. Once the pork releases easily from the pan, you're ready for the next layer of flavor.
🍳 Step 2: Build Layers of Aroma with Onion, Garlic, and Ginger
Remove the pork belly and set it aside. In the same Dutch oven (no need to wipe it clean—the rendered fat is flavor gold), add the 2 whole yellow onion (quartered), 8 cloves garlic (smashed with skin on), and 0.5 cup fresh ginger (julienned). Cook over medium heat for 8-10 minutes until the onions soften and the garlic and ginger become fragrant.
Stir occasionally so nothing burns—especially the ginger, which can scorch quickly. You'll know it's ready when the onions are translucent and the garlic skins start to blister slightly. This step develops the sweet, savory base that'll carry through your entire broth. Don't skip it—these aromatics are where the magic begins.
🥘 Step 3: Simmer with Mushrooms, Spices, and Pork for Deep Flavor
Add the 4 whole dried shiitake mushrooms (torn quarters), 2 whole star anise (lightly crushed), 0.5 cup light soy sauce, 2 tbsp white miso paste, 8 cups water, 1.5 tsp salt, and 10 whole black peppercorns (lightly crushed) to the Dutch oven. Return the pork belly to the pot and bring everything to a gentle boil.
Once boiling, reduce heat to low and let it simmer uncovered for 3 hours. Here's where patience pays off—the longer it simmers, the deeper the flavor. Skim any foam or impurities that rise to the surface during the first 30 minutes of simmering. You'll notice the pork belly will gradually break down and release its collagen into the broth, creating that signature ramen silkiness.
⏰ Step 4: Strain and Finish with Sesame Oil
After 3 hours of simmering, strain the broth through a fine-mesh sieve into a clean pot, pressing gently on the solids to extract all the flavor. Discard the solids—you've already captured everything you need. Return the strained broth to the pot and bring it back to a simmer over medium heat.
Stir in the 1 tbsp toasted sesame oil and taste. Adjust seasoning if needed—you might need a touch more salt or soy sauce to balance the flavors. The broth should be rich, slightly sweet from the caramelized onions, and deeply umami from the pork and mushrooms. If it's too thin, simmer uncovered for another 15-20 minutes to reduce slightly. If it's too thick, add a little hot water to reach your desired consistency.
🍽️ Step 5: Serve Warm with Fresh Garnish
Ladle the finished broth into bowls and garnish with chopped green onion just before serving. The fresh green onion adds a bright contrast to the deep, rich flavors of the broth. Serve immediately while hot—this broth tastes best fresh from the pot, when all the aromas are at their peak.
Real talk: This broth will keep in the refrigerator for up to 5 days or can be frozen for 3 months, but it's so good I rarely have leftovers. The flavors only deepen over time, so don't hesitate to make extra for future ramen nights. Each sip should transport you to a bustling Tokyo ramen shop—thick, comforting, and packed with umami.
Pro Tips For Making Pork Belly Ramen Broth
- CRACK THE BELLY FIRST: Split the pork belly into 1-inch chunks before browning—thicker pieces release collagen slower and leave you with uneven texture. I learned this the hard way when my first batch had chewy bits floating in an otherwise perfect broth.
- SOAK MUSHROOMS SEPARATELY: Rehydrate dried shiitakes in a separate bowl of hot water, not directly in the broth pot. This prevents them from turning to mush and lets you strain out the gritty sediment before adding them back later—your broth will stay cleaner, and the flavor stays concentrated.
- BROWN THE BELLY IN BATCHES: Don’t crowd the pan—work in 2-3 batches if needed. Rushing this step means steam instead of sear, and you’ll end up with pale, bland fat instead of deep, nutty caramelization. Yes, it takes longer, but the difference is night and day.
- SAVE THE GINGER PEEL: Use the outer layer of fresh ginger (peeled but untrimmed) for the initial simmer—it adds a subtle heat and earthiness that disappears once you trim it. Toss it in whole for the first 20 minutes, then slice it thin for the final hour. (Your future self will notice the difference.)
Essential equipment for this recipe
Dutch Oven Essentials
Your Dutch oven is the workhorse of this recipe—Lodge 5.5-quart cast iron is my go-to because it retains heat beautifully and handles the long simmer without hot spots. If you don’t own one, All-Clad Stainless Steel is a great alternative, though it requires more attention to prevent burning.
I’ve cooked thousands of batches in mine, and it’s become my most trusted piece of equipment for broths like this. 🔥
Fat Skimmer Tool
A fat skimmer (like the OXO Good Grips) is non-negotiable for this recipe. You’ll use it to remove impurities during the first 30 minutes of simmering, ensuring your broth stays crystal clear.
I keep one permanently in my kitchen—it’s one of those tools that makes repetitive tasks feel like a breeze. Without it, you risk cloudy broth, which can ruin the delicate balance of flavors we’re working toward.
Fine-Mesh Sieve
For straining, I swear by a stainless steel fine-mesh sieve (like the Norpro 3-in-1)—it catches all the tiny particles while letting the broth flow freely. A regular colander won’t cut it here; you need something that filters out even the finest sediment.
Pro tip: Press the solids gently with a wooden spoon to extract every last drop of flavor. This step is where you capture the essence of hours of simmering.
Instant-Read Thermometer
A ThermoWorks ThermoPop is my secret weapon for monitoring the broth’s temperature, especially during the long simmer. You want to keep it between 180-190°F—any hotter, and you risk burning the delicate flavors.
I check it every 30 minutes to ensure consistency. If you’re new to broth-making, this small investment will save you from bitter, overcooked results.
Wooden Spoon
Never use metal utensils when stirring this broth—wooden spoons (like the Ozeri Touch-Grip) are your best friend. They won’t scratch your Dutch oven and won’t react with the acidic ingredients like metal can.
Plus, they’re gentle on your hands during those long simmering sessions. I’ve got a whole drawer dedicated to wooden spoons, each with its own purpose in the kitchen.
Storage Containers
For leftovers, glass Pyrex storage containers (or Cambro food pans) are ideal—they keep the broth fresh for up to 5 days in the fridge. If you’re freezing, quart-sized freezer bags work best, leaving 1 inch of headspace for expansion.
I label everything with dates because, trust me, you’ll want to use this broth again and again. The fat layer on top is pure liquid gold—save it for future cooking or drizzle it over noodles for extra richness. ❄️
Nutrition facts
Frequently asked questions
Can I use pork shoulder instead of pork belly for this broth?
The recipe relies on pork belly's fat content for that signature richness, but you can use pork shoulder if that's all you have. Cut it into 1-inch cubes and increase simmering time to 4 hours to ensure proper collagen breakdown. The fat yield will be lower, so you might need to add 1 extra tablespoon of sesame oil for depth. The flavor will be slightly leaner but still delicious.
How do I know when the broth is done simmering?
The broth is ready when it develops a glossy fat cap on top and the pork belly pieces are fork-tender. After 3 hours of simmering, taste it—it should be rich, slightly sweet from the onions, and deeply savory with no raw pork flavor. If it's still too thin, simmer uncovered for 15-20 more minutes to reduce. The aroma should be intoxicating, like a mix of caramel and umami.
What if my broth turns cloudy during simmering?
Cloudiness usually means impurities or overcooking. Skim foam aggressively during the first 30 minutes of simmering, and keep heat at 180-190°F using a thermometer. If it's already cloudy, strain it through a cheesecloth-lined sieve for extra clarity. For extra richness, add 1 extra tablespoon of miso paste or a splash of toasted sesame oil after straining.
Can I make this broth in an Instant Pot?
Yes, but with adjustments: Sauté the pork belly for 10 minutes on "Sauté," then add aromatics and cook for 5 minutes**. Add all remaining ingredients and pressure cook on High for 60 minutes. Let pressure release naturally for 15 minutes, then strain. The Instant Pot version will be slightly less reduced but still packed with flavor. For deeper richness, finish by simmering on the stovetop for 20 minutes after pressure cooking.
How should I store and reheat this broth?
Store in glass containers in the fridge for up to 5 days or freeze for 3 months. To reheat, warm on the stove over medium-low heat until just simmering—never boil. For extra richness, add a splash of cold water and stir in 1 teaspoon of toasted sesame oil before serving. The fat layer on top is precious—save it to cook with or drizzle over noodles for that authentic ramen touch.