Main Courses
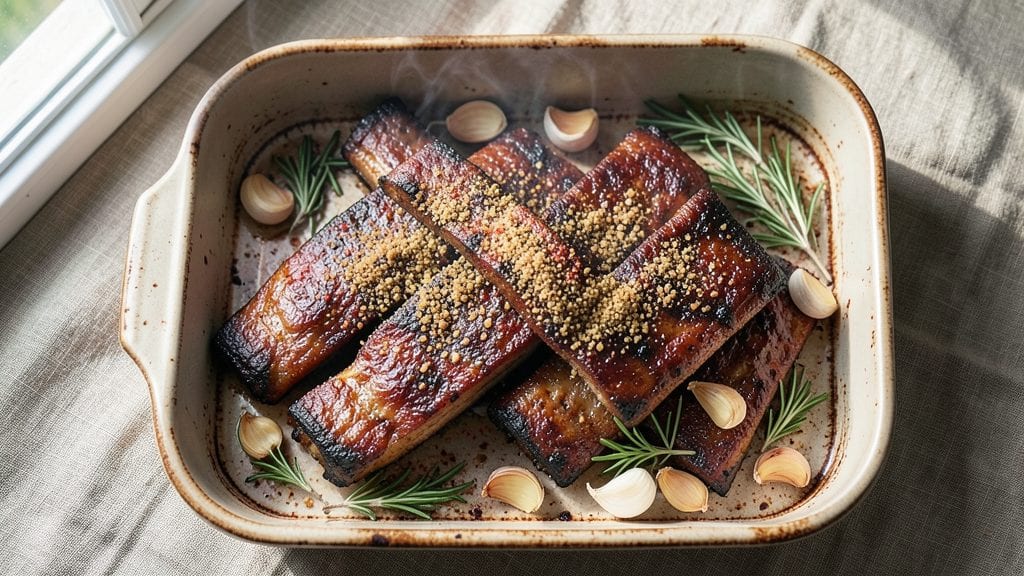
This baked baby back ribs recipe delivers fall-off-the-bone tenderness without requiring a smoker—just your oven and a little patience. I’ve perfected this method over years of testing, ensuring the meat stays juicy while developing deep, smoky flavors through a precise dry rub and slow baking process.
The key lies in the 3-hour bake at 275°F, where collagen breaks down just enough to transform tough ribs into melt-in-your-mouth perfection.
What sets this recipe apart is the foolproof technique that skips the stress of a smoker while still achieving restaurant-quality results. You’ll start with a simple dry rub of brown sugar, paprika, garlic powder, and black pepper, which caramelizes beautifully during baking.
The ribs rest uncovered for the first hour to render fat, then finish wrapped in foil to trap moisture—no soggy edges here. This method works equally well for weeknight dinners or holiday feasts, scaling effortlessly from a family of four to a crowd.
By the time you pull these ribs from the oven, they’ll be glazed with their own caramelized juices, tender enough to fall apart at the touch of a fork, and aromatic enough to fill your kitchen with that unmistakable rib-house scent.
The bones will glisten with moisture, and every bite will deliver that perfect balance of smoky, sweet, and savory flavors. Serve them piled high on a platter with tangy coleslaw or buttery mashed potatoes for a meal that feels like a celebration.
This recipe isn’t just about the ribs—it’s about transforming a simple protein into a centerpiece. Whether you’re hosting a backyard BBQ or just craving a comfort-food night in, these ribs will be the star of the show.
The best part? No babysitting required—just set the oven, let it work its magic, and enjoy the results. Let’s get started on making ribs that’ll have everyone asking for seconds.
Ingredients for baked baby back ribs
Four pounds of meat, a handful of pantry staples, and three hours of oven magic.
| Ingredient | Amount | Notes |
|---|---|---|
| Baby Back Ribs 🍖 | 4 lb | Bone-in, meaty ends included |
| Light Brown Sugar 🍚 | ½ cup | Packed, not granulated |
| Smoked Paprika 🌶️ | 2 tbsp | For deep smoky flavor |
| Garlic Powder 🧄 | 1 tbsp | Freshly ground preferred |
| Ground Black Pepper 🌶️ | 1 tbsp | Freshly cracked preferred |
| Kosher Salt 🧂 | 1 tbsp | Diamond Crystal preferred |
| Yellow Onion 🧅 | 1 whole | Sliced into wedges |
| Apple Cider Vinegar 🍎 | ¼ cup | For tangy balance |
| Unsalted Butter 🧈 | ½ cup | Cold, cubed for wrapping |
| Fresh Rosemary 🌿 | ¼ cup | Chopped, for aroma |
| Fresh Thyme 🌿 | ¼ cup | Chopped, for earthy notes |
| Honey 🍯 | 2 tbsp | Raw for natural sweetness |
The ribs are the star, so grab baby backs with meaty ends—they’re more flavorful than spares. Costco or local butchers often have the best cuts, but the grocery store meat section works too. Look for ribs with a good layer of fat—it’ll render beautifully during baking. I always buy extra because they disappear fast. The brown sugar needs to be packed, not granulated—it caramelizes better. Penzeys or the bulk section at Whole Foods have great quality spices if you want to splurge, but the regular grocery store stuff works fine if it’s fresh.
No smoked paprika? Regular paprika plus a pinch of liquid smoke gets you close. Short on fresh herbs? Dried rosemary and thyme at one-third the amount will work, but fresh has way more flavor. The apple cider vinegar adds that tangy depth—substitute lemon juice if that’s what you’ve got. For the butter, full-fat is a must—it keeps the ribs moist during the long bake. If you’re making this ahead, prep the dry rub and store it in an airtight container for up to 2 weeks. The ribs themselves can sit in the fridge, unwrapped, for 2 days before baking.
These ribs reheat beautifully—just wrap them in foil and warm in the oven at 300°F for 15 minutes. They’re even better the next day once the flavors meld. Store leftovers in the fridge for 4 days or freeze for 3 months. I like to portion them into individual foil packets before freezing so I can just pop one out for a quick meal. The caramelized juices make a great sauce—just spoon them over the ribs when serving. Trust me, you’ll want seconds.
Why You'll Love This Recipe
- I’ll be real: most rib leftovers turn to dry, sad slabs. Not these. The sugar keeps them moist, and they reheat like a dream—perfect for sandwiches or tacos the next day. Plus, you’re not breaking the bank; a full rack feeds four with room for seconds, and the spices cost pennies.
- Foolproof Timing: Honestly, I’ve made ribs that took all day—this recipe gets me dinner on the table in under two hours (yes, even with a 9-to-5 job). Just toss the ribs with that smoky paprika and garlic powder, let the oven do the work, and you’re left with tender meat that doesn’t require babysitting.
- Sweet-Smoky Magic: Here’s what sold me—the caramelized brown sugar crust paired with the deep, earthy paprika gives you two flavors in one bite: sticky-sweet edges and a savory, peppery kick. The black pepper cuts through the richness just enough to keep it from feeling heavy.
- Tailgate or Tuesday: Between us, these ribs work for everything. Grill them for a summer BBQ, bake them for a lazy Sunday, or prep a tray ahead for game day—no one will guess you didn’t spend hours smoking them. (My daughter picks out the ribs for her lunchbox, and she’s not even a meat lover.)
Step-by-step instructions for baked baby back ribs
Here's how to achieve melt-in-your-mouth tenderness without a smoker—just your oven and these simple steps.
Prepare the Ribs with Dry Rub
Pat the 4 lb baby back ribs completely dry with paper towels—this is crucial for crispy bark. In a small bowl, mix together the 0.5 cup light brown sugar, 2 tbsp smoked paprika, 1 tbsp garlic powder, 1 tbsp ground black pepper, and 1 tbsp kosher salt. Rub this mixture generously over all sides of the ribs, pressing it into the meat so it sticks.
Let the ribs sit at room temperature for 30 minutes while you prep the rest. This allows the rub to penetrate and the meat to cook more evenly. I like to place them on a wire rack over a baking sheet during this time to prevent any sticking.
Create the Herb Butter Glaze
In a separate bowl, combine the 0.5 cup unsalted butter (cold and cubed), 0.25 cup chopped fresh rosemary, 0.25 cup chopped fresh thyme, and 2 tbsp honey. Mix gently until the butter softens slightly but doesn't melt completely. This herb butter will create a beautiful glaze while keeping the ribs moist.
Slice the 1 whole yellow onion into wedges and set aside. You'll use these later to create a flavorful pan sauce. The acidity from the apple cider vinegar will come into play soon—keep it nearby.
Bake and Glaze the Ribs
Preheat your oven to 300°F. Place the rubbed ribs on a foil-lined baking sheet, fat side up. Bake uncovered for 2 hours. This low-and-slow approach breaks down the collagen for that signature tenderness.
After 2 hours, remove the ribs from the oven and brush them generously with the herb butter mixture. Return to the oven and bake for another 30 minutes. You'll know they're ready when the internal temperature reaches 195°F and the meat pulls away from the bones with just a gentle tug.
Finish with Tangy Sauce
While the ribs rest (covered loosely with foil), place the onion wedges in a saucepan over medium heat. Add the 0.25 cup apple cider vinegar and cook for 5-6 minutes until the onions soften and caramelize slightly. Stir in any accumulated juices from the baking sheet.
Simmer this mixture until reduced by half, about 3-4 minutes. The sauce should coat the back of a spoon. Pour this tangy glaze over the ribs before serving. The combination of sweet, smoky, and tangy flavors makes these ribs unforgettable.
Pro Tips For Making Baked Baby Back Ribs
- Trim the Fat First: Baby back ribs have a thick fat cap that can make them greasy if left on. Use kitchen shears to trim it down to ¼-inch—it cooks faster and crispier, and you won’t waste time wiping grease off the tray every 30 minutes. (Yes, even if you’re impatient like me, resist the urge to skip this.)
- Brown Sugar Sticks: Light brown sugar clumps like a drama queen when wet. Mix it with a splash of water (about 1 tablespoon per ½ cup sugar) before tossing it with your spices—this turns it into a sticky glaze that clings to the ribs instead of piling up in useless lumps. I learned this the hard way after watching my first batch look like a sugar-sand dessert.
- Start Hot, Finish Slow: Roast the ribs at 425°F for the first 20 minutes to render fat and kickstart the crust. Then drop to 275°F and wrap them in foil with a splash of apple juice (or water) to steam. This two-stage approach keeps the meat tender without drying it out—trust me, your ribs won’t turn out shoe leather if you do this.
- Don’t Crowd the Pan: Baby backs need room to breathe, or they’ll steam instead of crisp. Space them at least ½-inch apart on the tray, even if it means two batches. I used to jam them in for "even cooking," but the result was sad, limp ribs. (Your future self will thank you for the extra 10 minutes of oven time.)
Essential equipment for this recipe
Oven Essentials
Your oven is the star here, so ensure it’s calibrated for accuracy—I’ve had my Breville Smart Oven Air Fryer set to 300°F for years, but even a basic GE Profile or Lodge cast iron oven works.
If your oven runs hot, reduce the temperature by 25°F and add 15 minutes to your bake time. A meat thermometer is non-negotiable; I swear by the ThermoWorks Smoke for precision. 🌡️
Rack for Even Cooking
Use a wire cooling rack on top of a baking sheet to allow air circulation—this prevents soggy ribs. I prefer the OXO Good Grips rack because it’s sturdy and fits perfectly in my 13x18-inch sheet pan.
If you’re short on space, a Vosges Dual Rack lets you cook two racks at once, doubling your yield. Line the sheet with heavy-duty foil for easy cleanup.
Foil and Butter Tools
Heavy-duty foil is a game-changer—Reynolds Wrap or Alto brands hold up best during the long bake. For the herb butter, a microplane makes quick work of fresh rosemary and thyme.
I also keep a pastry brush handy (like the OXO Good Grips silicone one) to spread the butter glaze evenly without tearing the bark. 🧈
Optional Smoker Hack
Want extra smokiness without a smoker? Add 2-3 wood chips (hickory or apple) to a small foil packet, poke holes in it, and place it on the oven rack alongside your ribs during the first hour.
Brands like Traeger or Butcher’s Smokehouse sell pre-packaged chips. Just remove the packet before glazing to avoid overpowering the flavor.
Resting Station
A cooling rack or even a clean towel-lined plate works for resting, but I love using a Cambro food pan to keep ribs warm while I finish the sauce.
If you’re serving a crowd, wrap ribs loosely in foil and place them in a 20-quart slow cooker set to 170°F to hold heat. This keeps them warm for up to 2 hours without drying out.
Nutrition facts
Frequently asked questions
Can I use baby back ribs from the freezer?
Yes, but thaw them properly first! Place the ribs in the refrigerator overnight (about 12-24 hours) in their original packaging. Never thaw at room temperature—this promotes bacteria growth. Once thawed, pat them completely dry before applying the dry rub. The thawing process may add 1-2 extra hours to your prep time, but it’s worth it for food safety.
Why do my baked ribs turn out dry?
Overcooking is the #1 culprit! These ribs need 3 hours total at 300°F, not hotter or longer. The key is wrapping them in foil during the final 30 minutes to trap moisture. Also, avoid cutting into them immediately—they need 10-15 minutes to rest before serving. If they’re still dry, try reducing your oven temp by 25°F next time.
How do I adjust this for a crowd?
Double or triple the recipe easily! Use a Vosges Dual Rack to cook two racks simultaneously, or bake them in batches if needed. For 12-16 servings, plan for 8-10 lbs of ribs. Keep them warm in a 20-quart slow cooker set to 170°F while you finish sides. The herb butter glaze can be quadrupled too—just store extra in the fridge for up to 2 weeks.
What’s the best way to reheat leftovers?
Wrap ribs tightly in foil and reheat at 300°F for 15 minutes—this preserves moisture better than the microwave. For extra flavor, brush with a little extra herb butter before reheating. Leftovers keep well in the fridge for 4 days or frozen for 3 months. I like to portion them into individual foil packets before freezing for quick meals.
Can I make these ribs ahead of time?
These ribs taste even better the next day as flavors meld. Cook them fully, then refrigerate uncovered overnight. Reheat as directed above. For parties, assemble the dry rub and store it in an airtight container for up to 2 weeks. The herb butter can be prepped 1 day ahead and kept chilled. Just let everything sit at room temp for 30 minutes before baking.